Virtel Screen Redesigner in action
In this newsletter we work through the Virtel Screen Redesigner and present an actual modernization of a 3270 application. This newsletter is not for the faint hearted and demands that your have a thorough knowledge of web design. If you are not familiar with HTML, CSS and Java script then do not continue. VSR is intended as a tool for web designers who are familiar with these web components. Their functionality is used as a part of a modernization project and is utilized extensively when building a modernization project with VSR.
Install VSR
Installing VSR is a relatively simple. Download the VSR package and extract to a directory. Create a shortcut to the VirtelSR.exe program. That’s it. To remove it just delete the installation folder. The extracted package provides an installation document which contains further details.
Using VSR and Virtel
VSR utilizes the Virtel software as part of the modernization project. I have started up an instance of Virtel which I will use in this VSR example. We need to extract some information from Virtel and plug it into the VSR setup menu.
Our Virtel is setup up to use the following lines:-
F SPTHOLTV,LINES
VIR0200I LINES
VIR0201I VIRTEL 4.55 APPLID=APPLHOLT LINES
VIR0202I ALLOCATED IP ADDRESS = 192.168.170.033
VIR0202I INT.NAME EXT.NAME TYPE ACB OR IP
VIR0202I -------- -------- ----- ---------
VIR0202I C-HTTP HTTP-CLI TCP1 :41002 **
VIR0202I W-HTTP HTTP-W2H TCP1 :41001 **
VIR0202I ---END OF LIST---
We shall use the C-HTTP as the target line for out modernization project. This will have the ip address:port of 192.168.170.033:41002. This will be our “Base URL” for testing.
The W-HTTP address:port 192.168.170.033:41001 will be used for uploading our modernized templates.
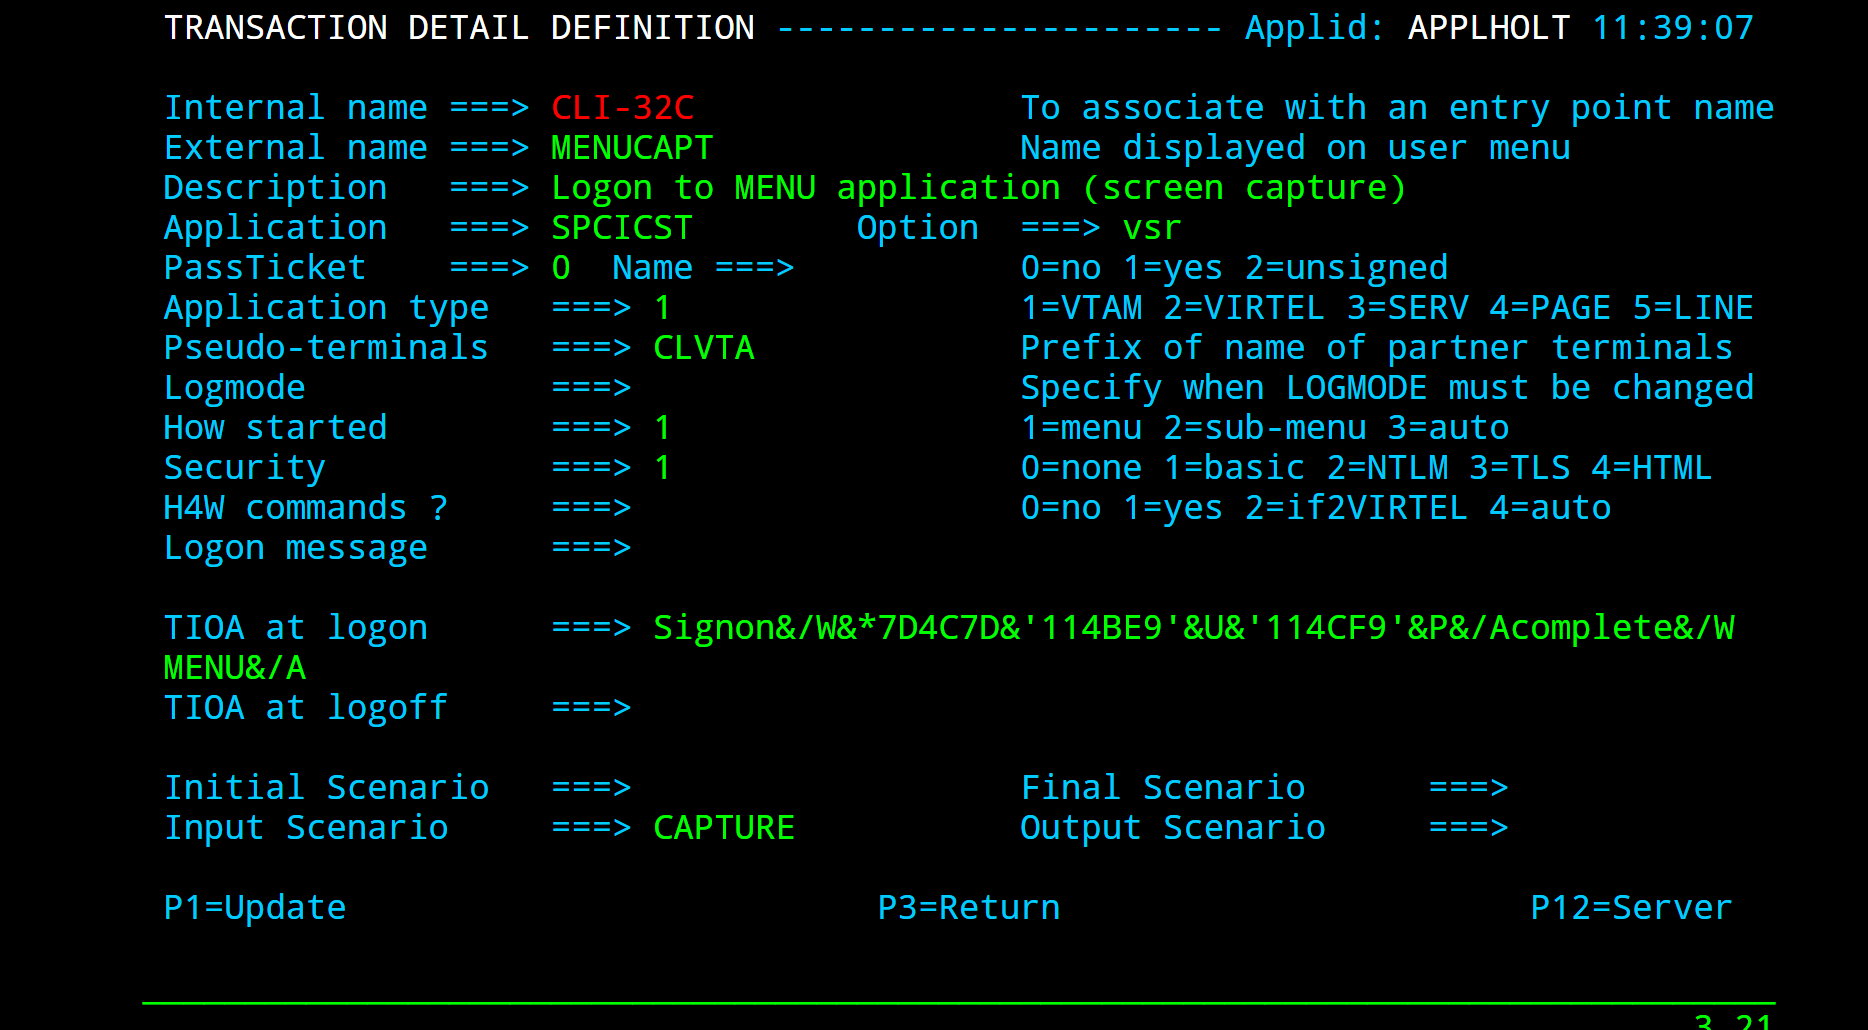
Next, we add the following two transactions to the CLIWHOST entry point based upon the sample VSR transactions TESTCAPT and TESTAJAX which can be found in the Virtel CLI-DIR directory. I use the Virtel administration panel to create these new transactions. AS my VSR project will be called MENU I create the transactions MENUCAPT and MENUAJAX. MENU is also the CICS transaction that invokes our 3270 MENU application.
Our MENUCAPT transaction looks like this:-
And our MENUAJAX transaction look like this:
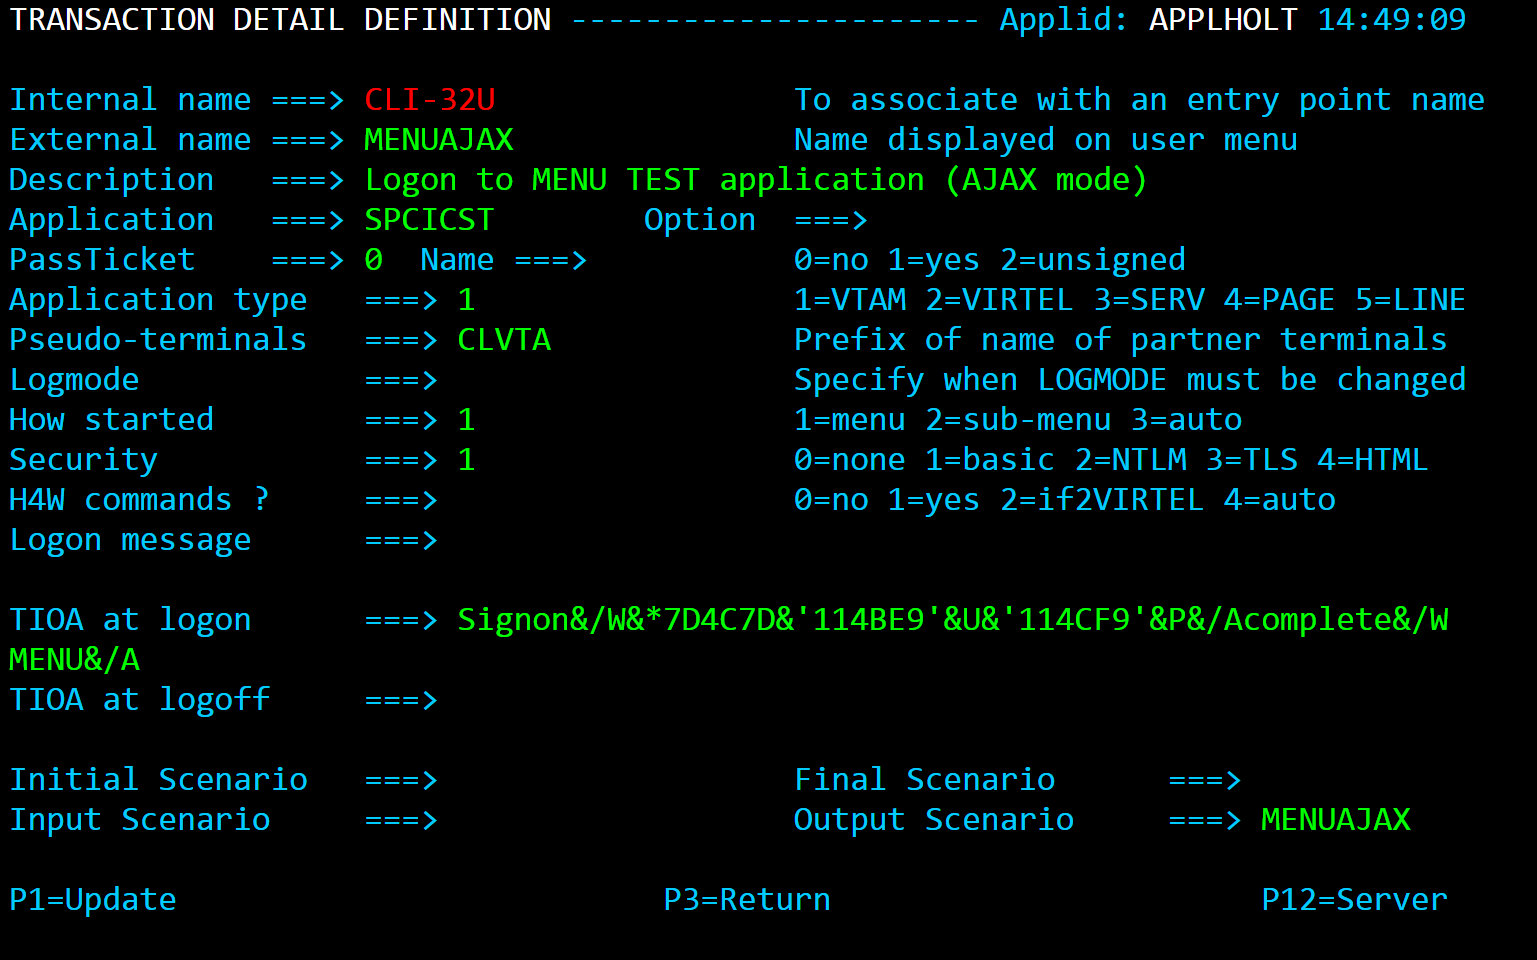
The TIOA string enables Virtel to use logon to CICS using the user id/password variables. The CICS application MENU is then called once CICS processes the logon and returns a 3270 screen image with the word “complete” in it.
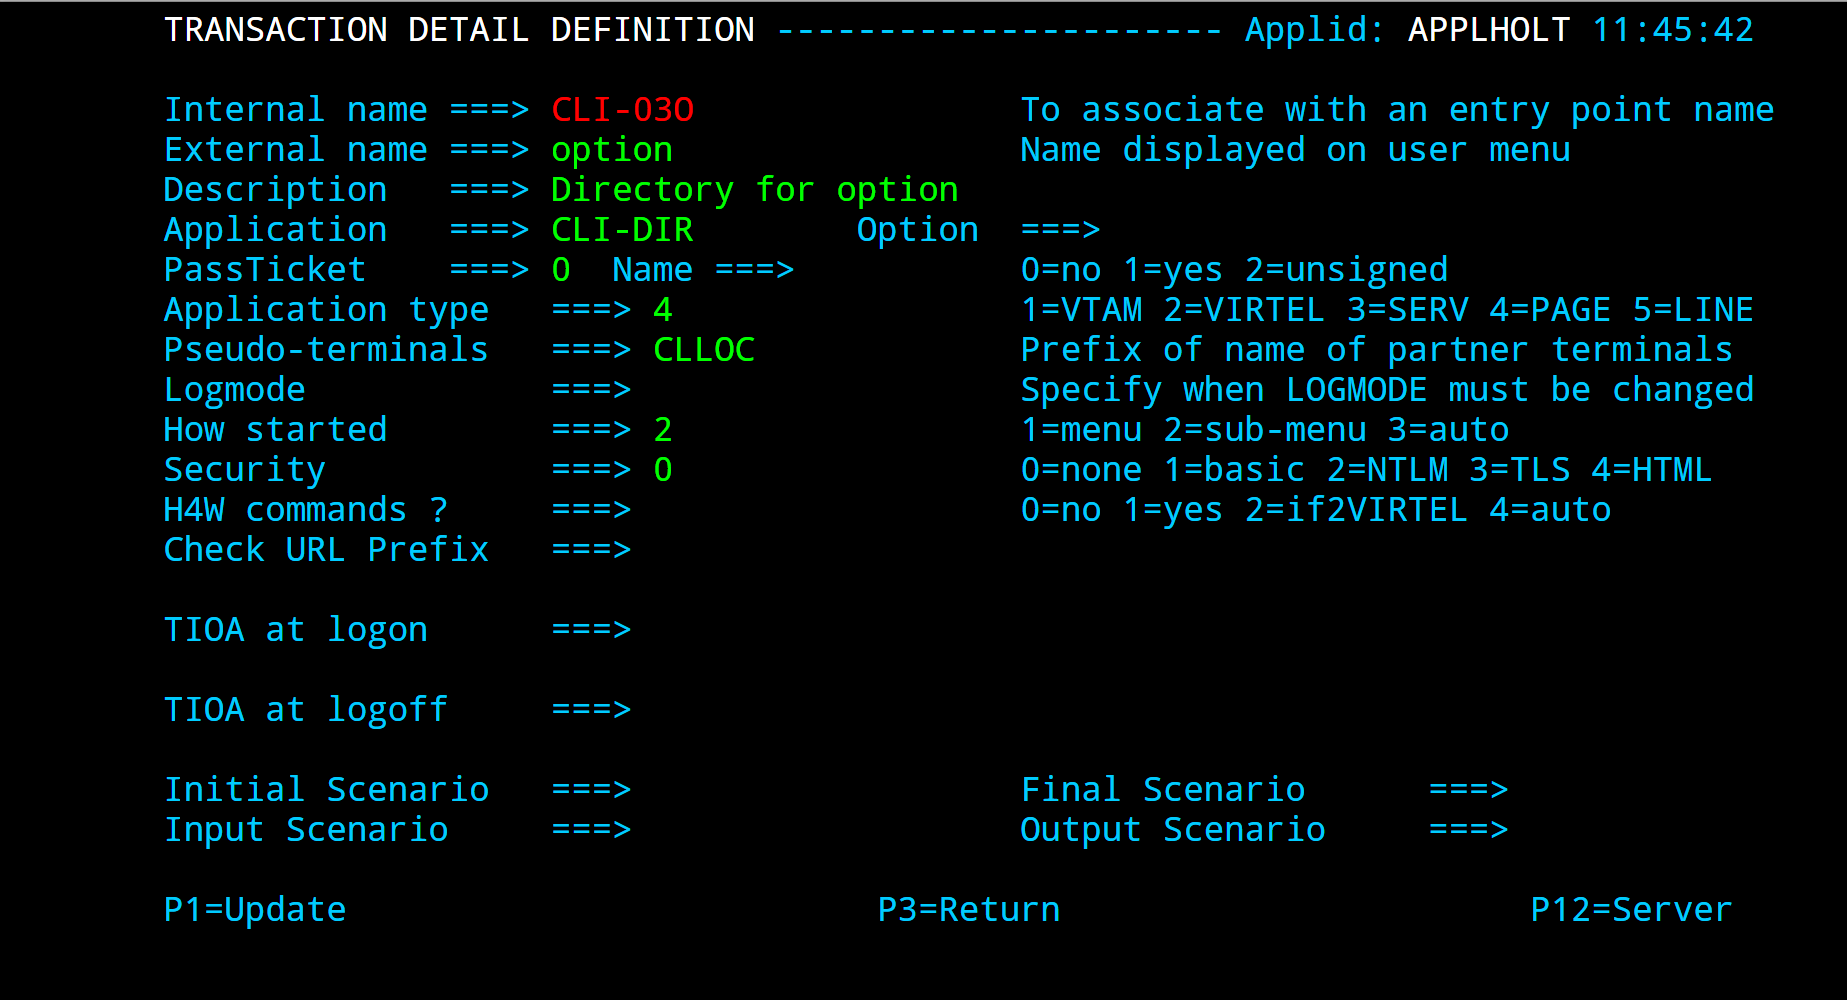
The Options directory
VSR has two modes of operation, Test mode and Standard mode. The CAPTURE transaction requires the use of the options directory, note the vsr value in the Option field. To support this we need to add the options directory, as a transaction, to the CLI entry point. The following transaction, CLI-03O, is added to CLIWHOST. It is modeled on the W2H transaction CLI-03W.
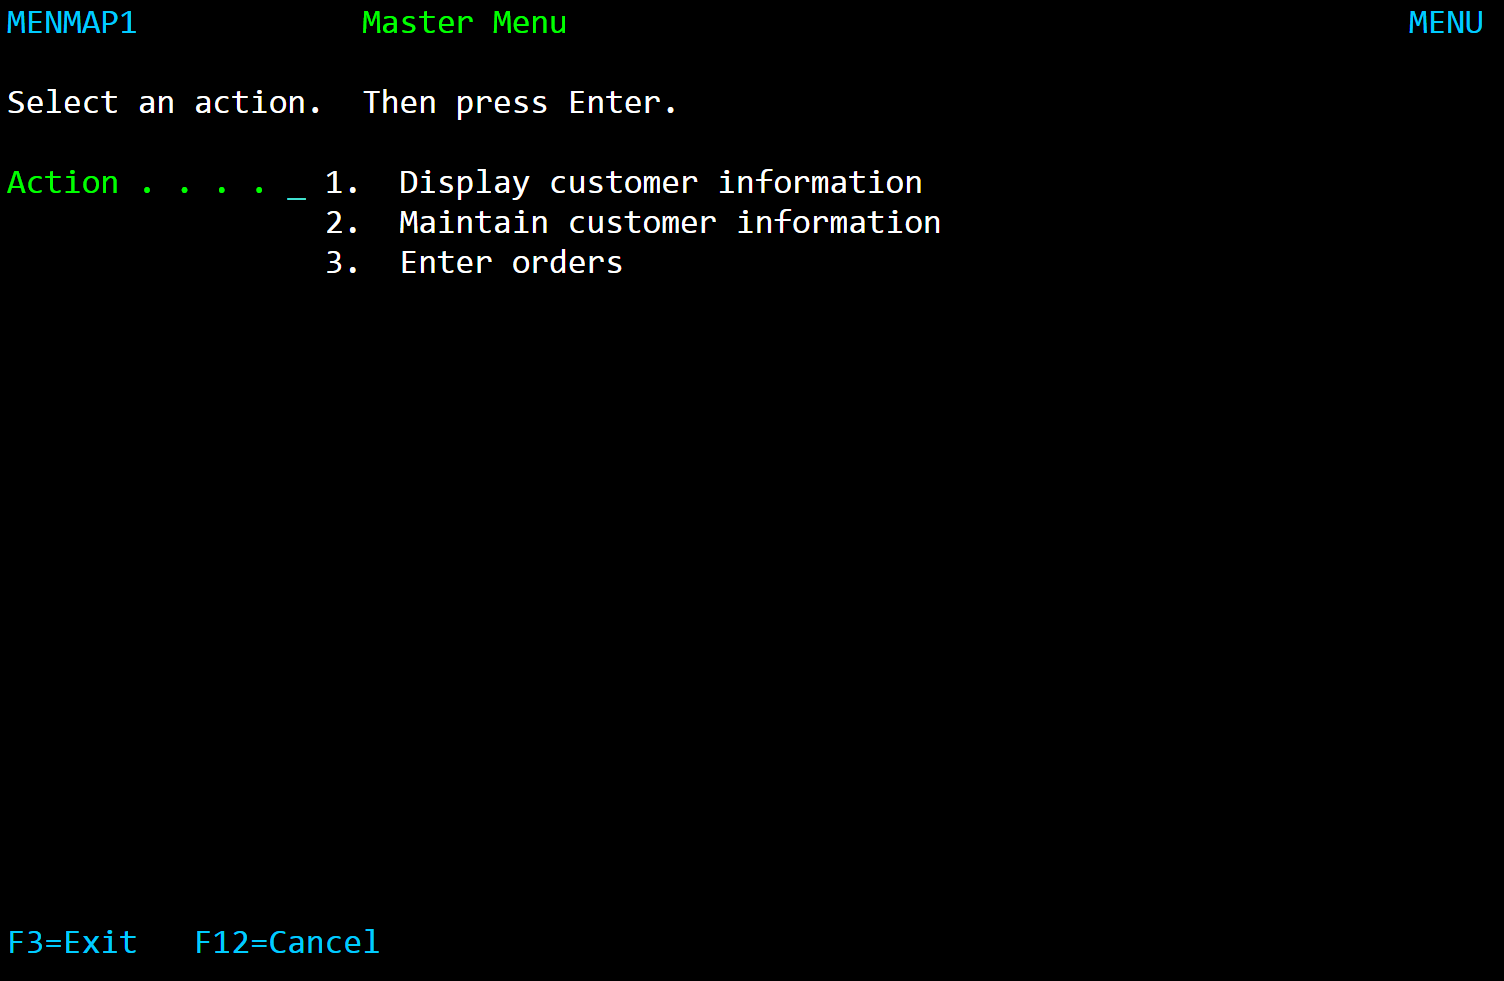
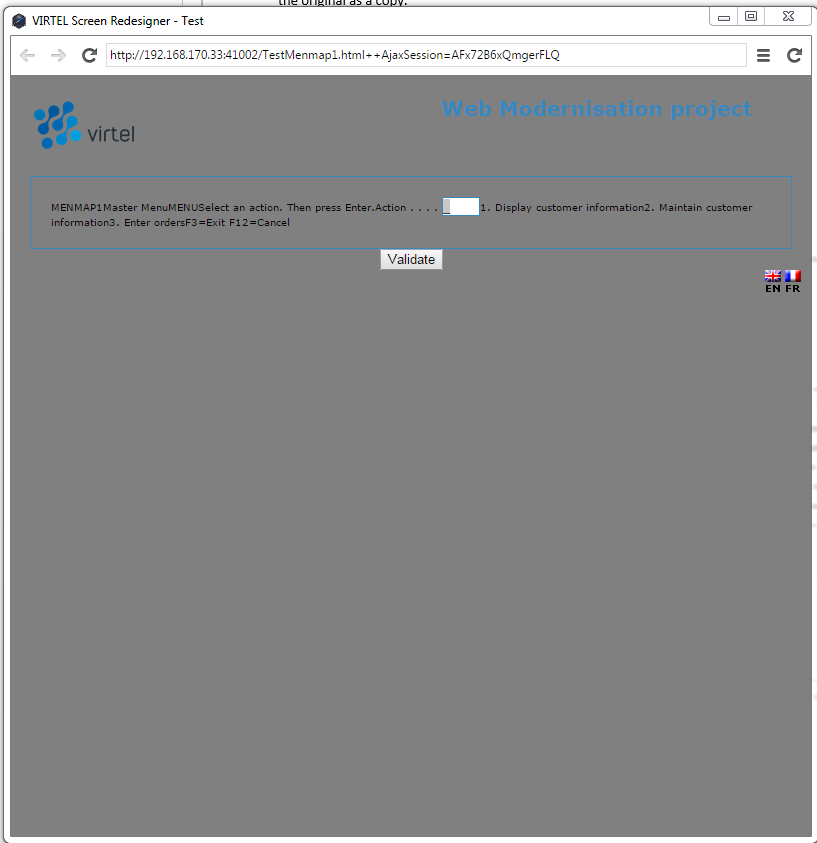
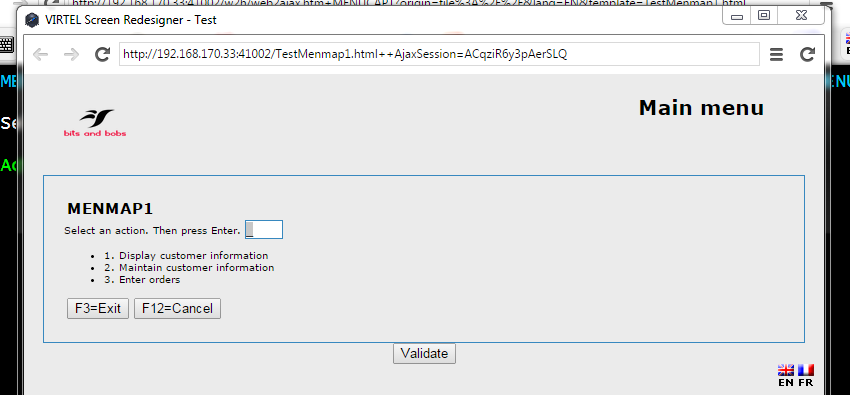
Our 3270 application front end screen looks like this:-
Mapping out the application
Before we can build the scenarios that will modernize our application we need to map out the navigability of the application and understand which maps are called based upon user actions. Our application looks like this:-
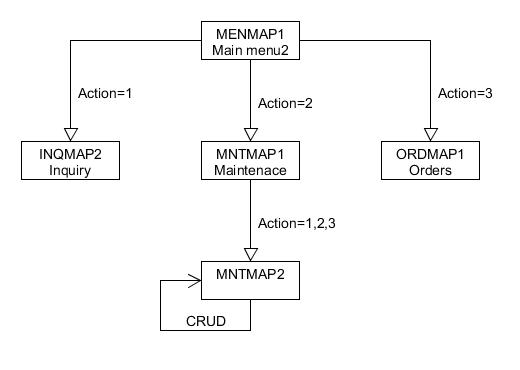
Fig. 1 - MENU Maps layout
Scenarios
Within VSR we use Virtel scenarios to analyze a 3270 screen buffer in order to produce the relevant HTML templates. Scenarios are loaded from either the Virtel STEPLIB or a user defined VSAM file. In this example we will loaded all the modernization scenarios for the Virtel STEPLIB. First we must customize and assemble the MENUAJAX scenario. Using the sample SELECTPG member in the Vitel SAMPLIB as a model we create member MEMNUAJAX, and assemble it using the ASMTCT. This job can be found in the Virtel CNTL library. See Appendix A for an example of MENUAJAX.
Having now prepared everything we are ready to build our modernization project with Virtel VSR.
Creating the VSR project
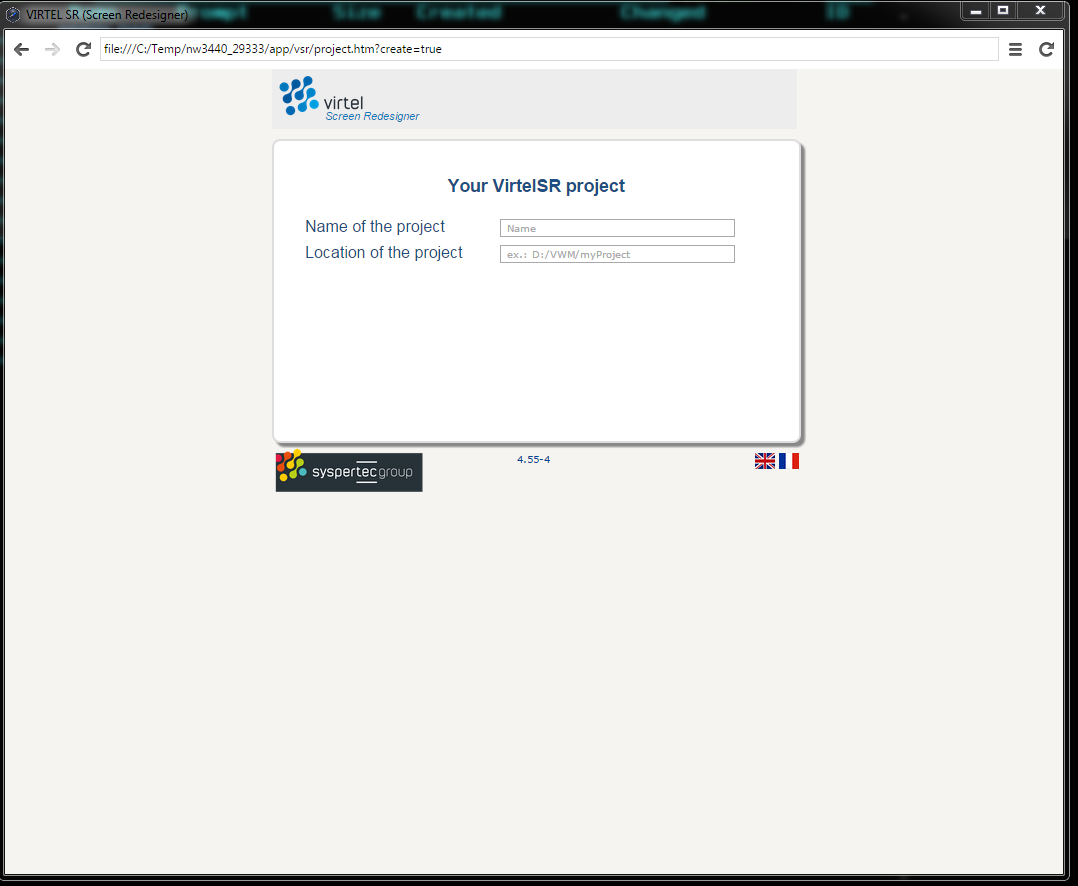
I open the VSR shortcut that I created on my desktop and I am presented with the initial VSR page where I can name and define my project directory. The direct must exist prior to creating the project.
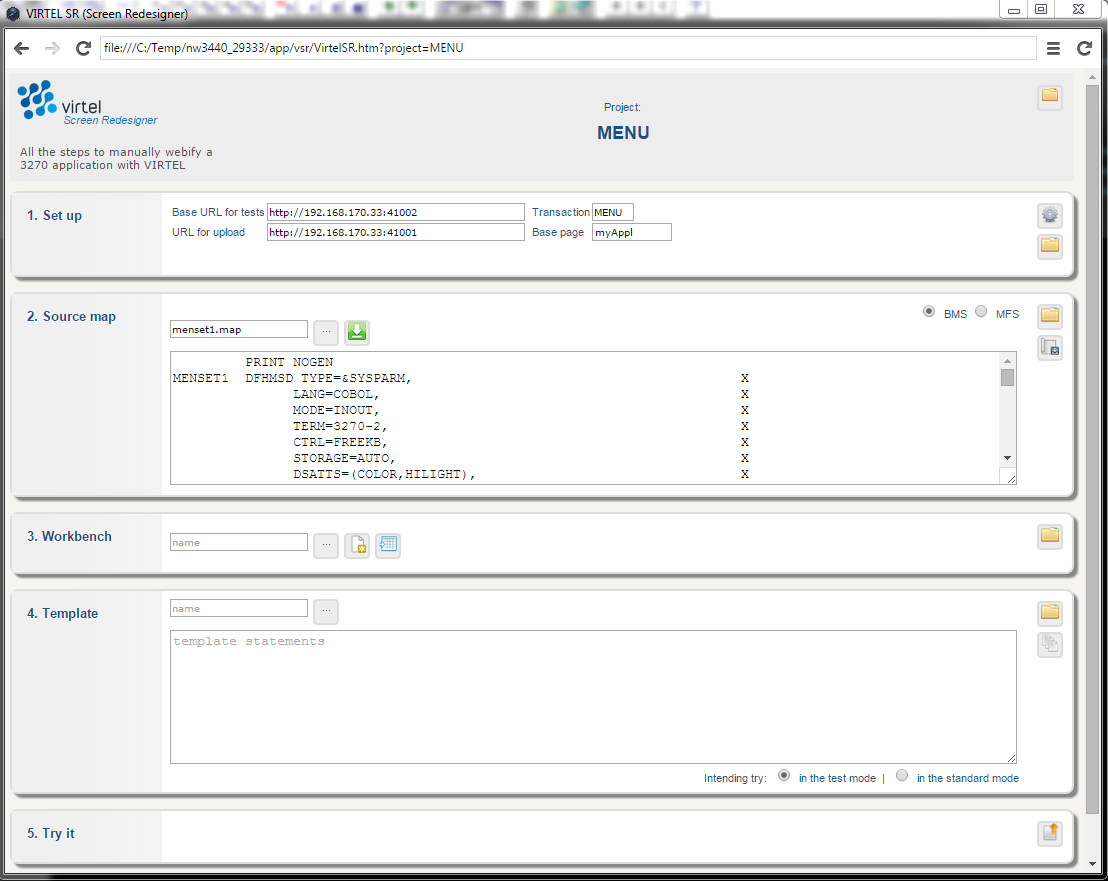
Following through the VSR manual I create my project and plug in the line variables that I extracted from my Virtel task. The VSR panel now looks like this:-
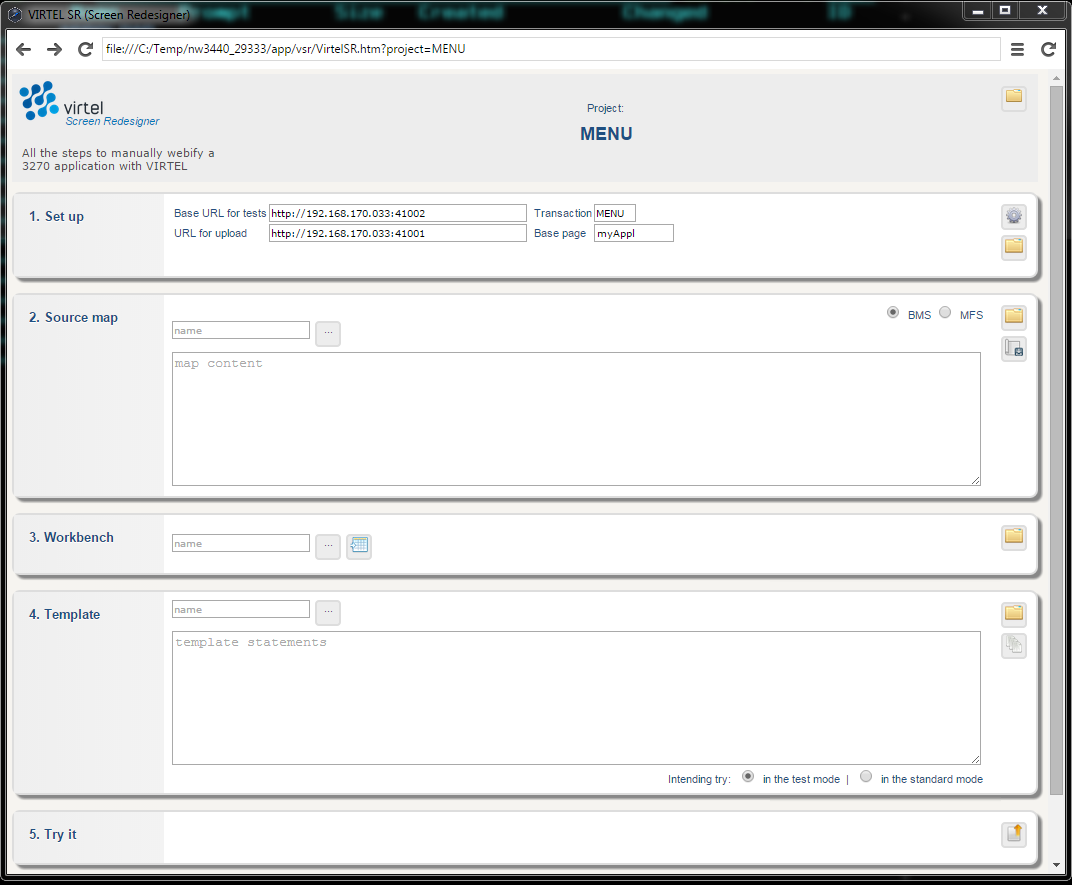
The main VSR panel is divided into 5 sections which help you to flow through the process of modernization. The sections are:-
Setup Configuration information. The settings cogwheel icon on the right will display and enable you to set the various settings for your project.
Source Map Location of Maps
Workbench Work bench of maps, either converted from source or manually created.
Template Generated template from workbench maps
Try it Display template either in Test Mode or Standard Mode.
Depending on selections within each section various ICONs will appear providing additional functionality. Sections 2, 3 and 4 require input sources. This is controlled by the selection ICON which is a button with three dots on it. It is a toggle button which actives the selection window to the left either as an input mode or in select mode. In input mode you can type into the entry window. For example when saving a template with a new name. I select mode it becomes a selection widget listing files in a directory which you can select from.
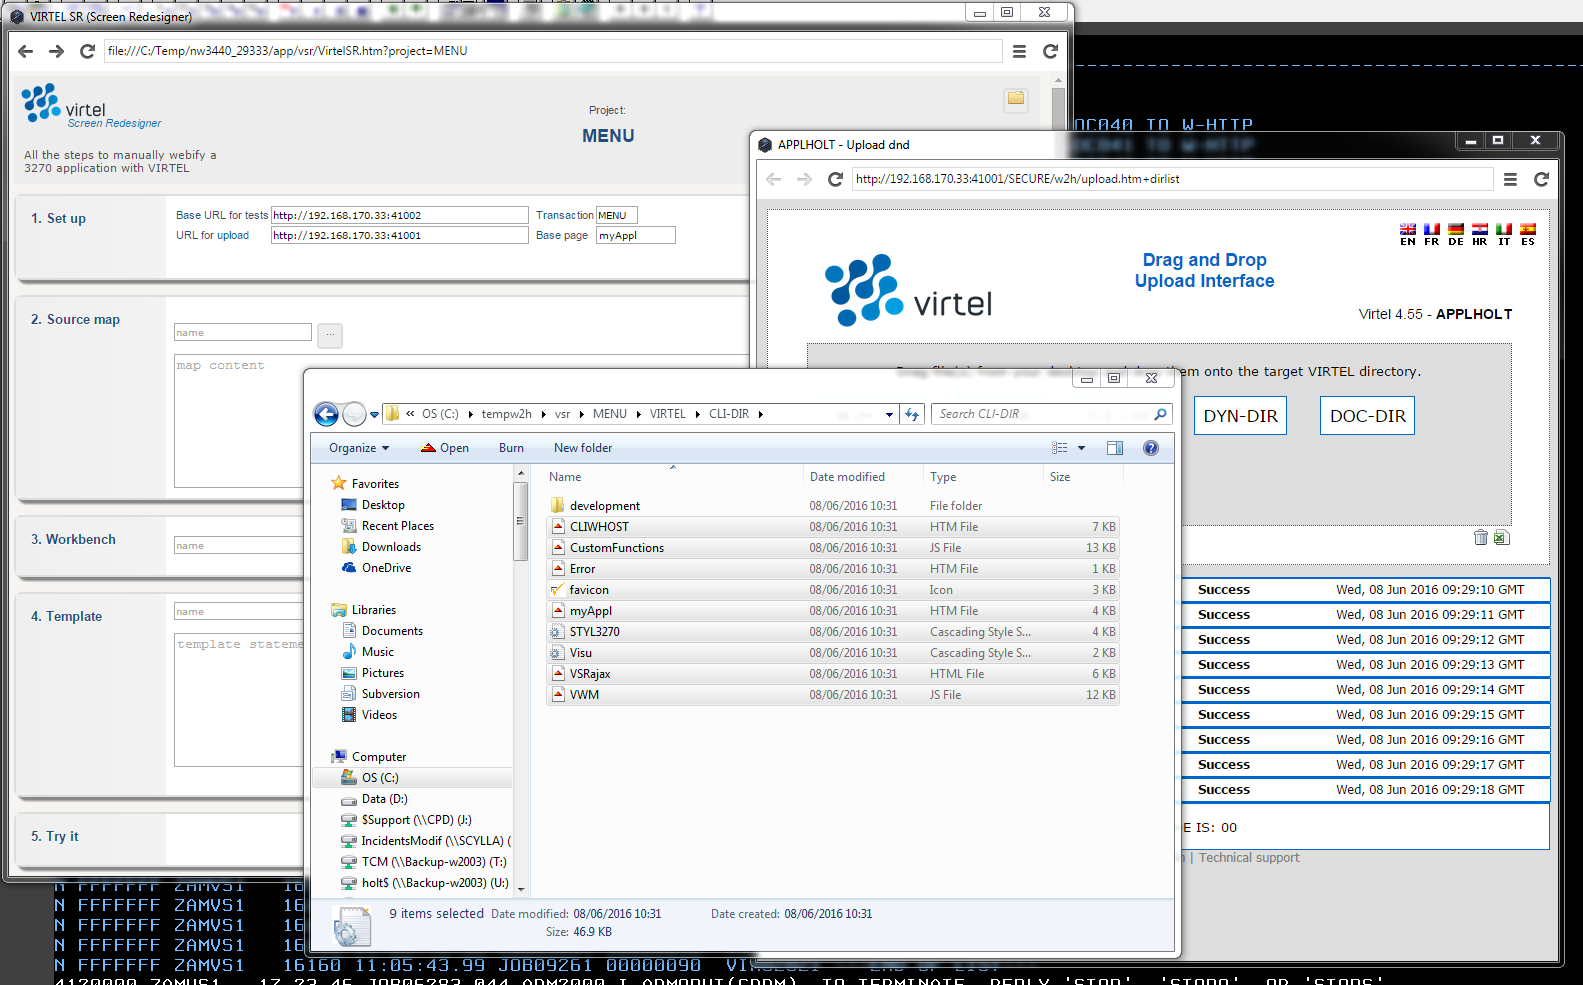
According to the VSR manual we upload the preliminary files which will support our modernization project into the CLI-DIR directory. Clicking the upload ICON on the right hand side in section 5 of the screen opens the Virtel drag and drop interface. From the modernization directory that I created I drill down to the virtel\cli-dir directory and upload the files to the CLI-DIR using the drag and drop interface. As we will be using “Test” mode in our modernization we also need to upload the files in the development directory to CLI. The three files we move into CLI are custom.js, vsr.js and option.vsr.
Note, these files are not required when modernizing in “standard” or production mode.
After successfully uploading the files I close the upload window and refresh my VSR screen using refresh ICON in the top right corner.
The next stage is to download my first CICS MAP from the mainframe and load it into VSR. The first MAP we are going to modernize is the main menu map MENMAP1. This map is defined with the MENSET1 PDS map member on the mainframe. I download the map as MENSET1.MAP and save it in MAP sub directory. Next, in section 2 of the VSR project window I enter the name of the map file and press the green LOAD ICON. The map loads and the Source map section is updated.
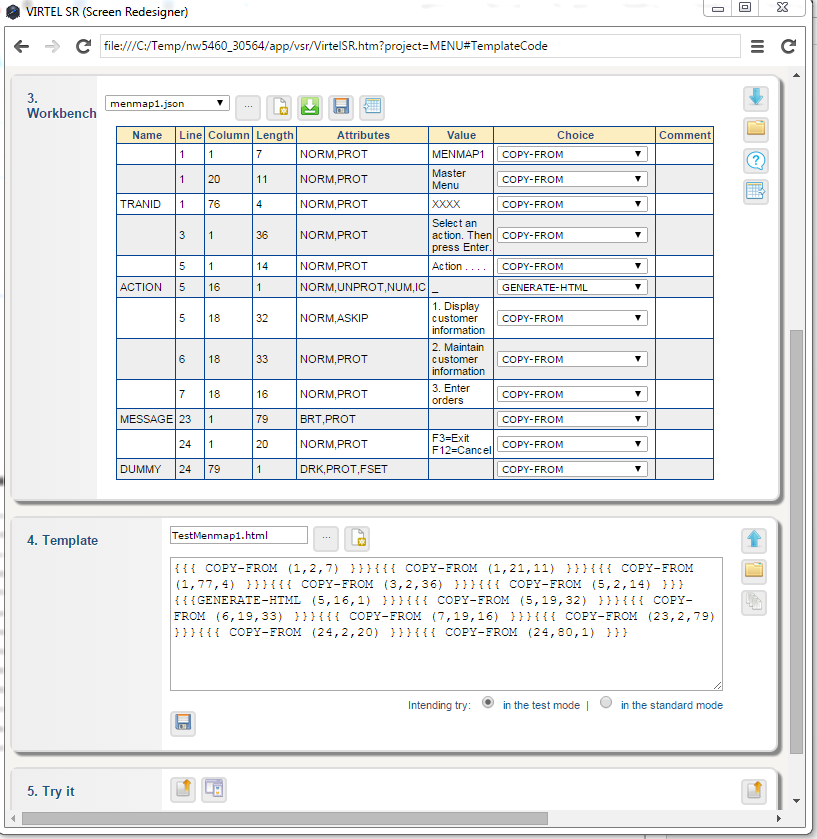
Having loaded my CICS MAP into VSR I can now create the work bench by pressing the CREATE ICON in the workbench area. The workbench is filled with rows, each row relating to a field with my CICS Map. I save the map as a JSON file called menmap1.json. VSR saves workbench maps as JSON files so I will use the JSON suffix for saving MAP elements.

At this point I can start to modernize my 3270 MENMAP1 MAP using the Choice column drop down. The drop down provides a variety on Virtel conversion and design options. These options will generate the necessary Virtel tags that will be the start of the modernization process. From the workbench I can see that the map is made up of a total of 12 elements spread across 6 lines. Line 1 has three elements, Line 3 has 1, Line 5 has 2, Line 6, 7 and 23 both have 1 element and finally line 24 has two elements. For this example I we change the ACTION line (5) and its associated untitled elements on line (5,6,7) to become a select drop down.
Following the VSR documentation I set the protected filed to the choice “COPY-FROM” and the unprotected ACTION field to the choice “GENERATE-HTML”. I have saved the workbench as MENMAP1. I then create the template by pressing the “Create” ICON in the Template section of the VSR display, section 5. This generates the Virtel tags which will support my modernized template. I save the template as Testmenmap1. The default extension of HTML will be added.
My VSR window now looks like:
Testing changes with “Test Mode”
One of the features of VSR is that you can view your modernization changes as you develop and before you commit them to standard or production mode. To do this upload the generated template by pressing the upload ICON upload button, the first ICON on the left in the “Try it” section. After uploading the template display the template within a Virtel capture window by pressing the “Try it” ICON, the second icon on the left hand side right in section 5. Now the MENU page is redisplayed in the capture window. Notice the two additional ICONS in the tool bar area. The first one is “Capture BMS Map” the second is “View the Modernized Rendering”. We use this second one so see what our modernized screen looks like based upon the elements that we have copied from the workbench into the template area. VSR will use Virtel to display the template.
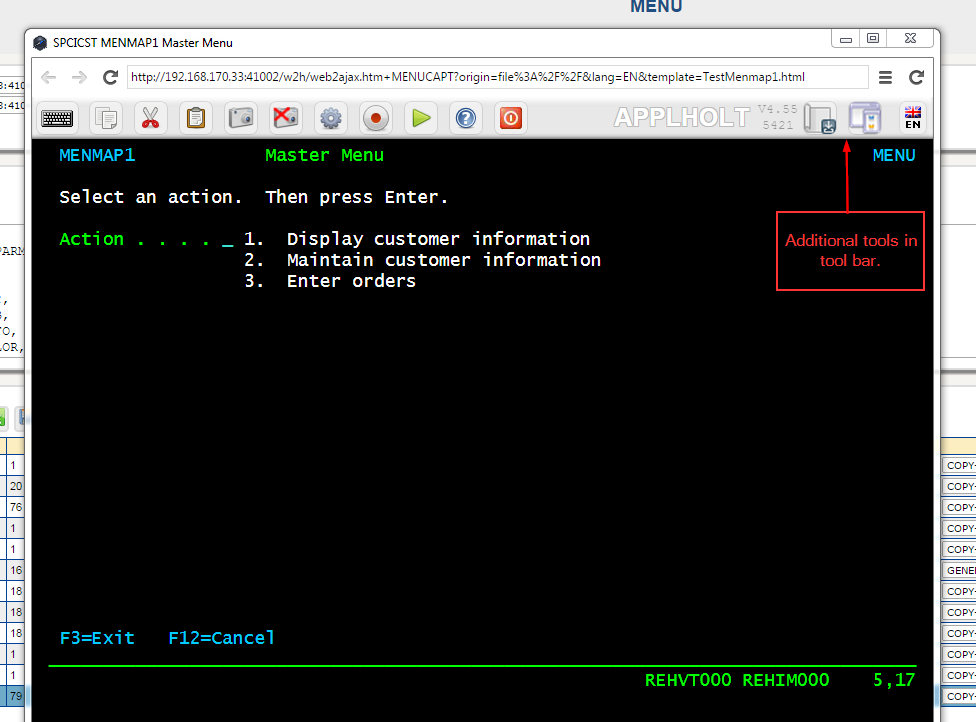
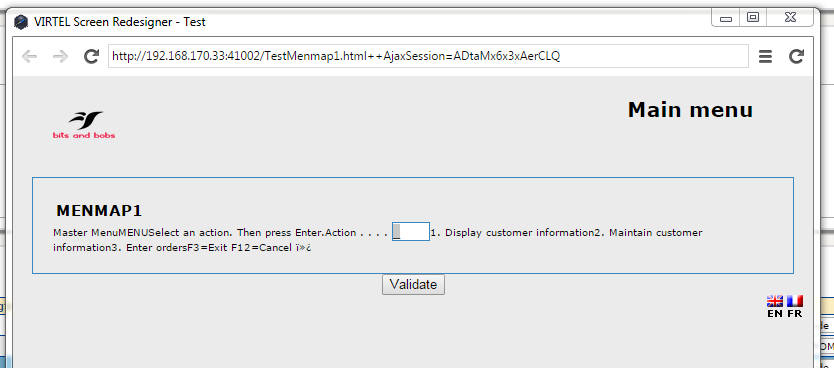
After pressing the “render” ICON we are presented with are modernized screen:-
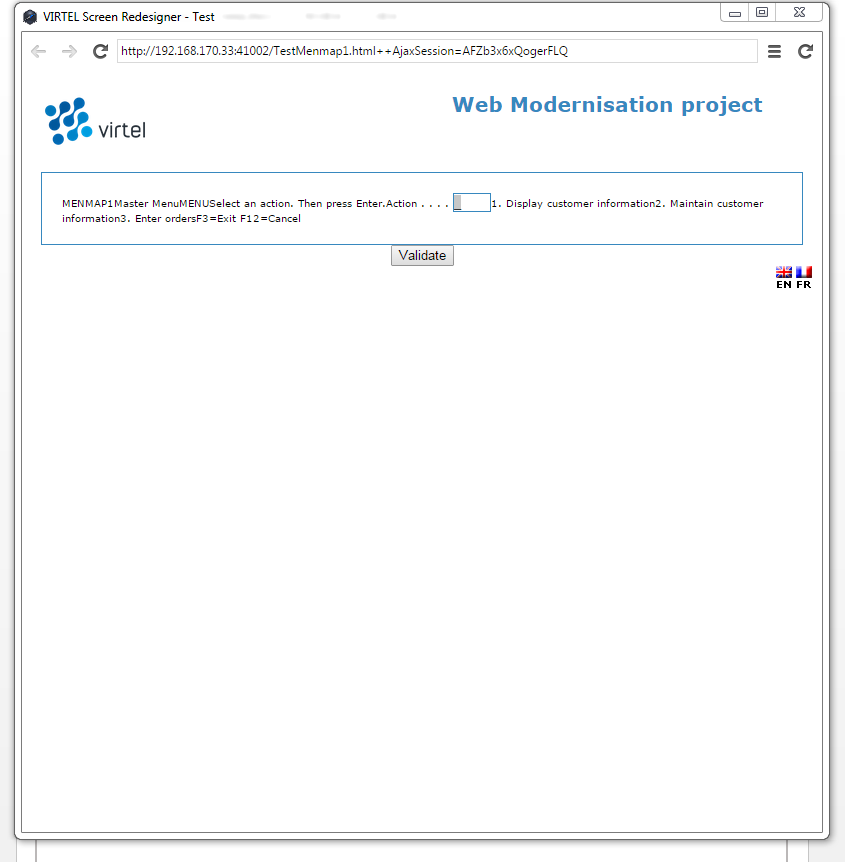
Nothing too exciting here. We can see that Virtel has taken the various elements from the Map, created the Virtel tags within the template, and displayed them without any special markup. Of course, the markup is down to us and this is where we begin our modernization using our HTML, CSS and Java script skills. The generated template statements form a sub-page which is sent to the browser after combing it with top and bottom sub-page elements. The top and bottom pages are called PageTop.html and PageBottom.html and are located in the Options directory of the project.
Our first modernization is to change the background colour. To do this we need a css file to customize. One is provided, Visu.css, and is include it in the PageTop.html file. This css file can be found in the VIRTEL\CLI-DIR sub directory of the project. We update visu.css and save it as menu.css, keeping the original as a copy.
Next we need to update the PageTop.html to include our menu.css style sheet. Here are the changes we made:-
<!--Stylesheet for the modernized application presentation -->
<!-- History 1. Style sheet visu.css replaced with menu.css-->
<link type="text/css" rel="stylesheet" href="menu.css"/>
<link type="text/css" rel="stylesheet" href="../w2h/lang.css">
The updated files are uploaded to the CLI-DIR using the right hand upload ICON in the try-it section. We must save the template in section 4 in order to pull in the modified pagetop.html file. This process creates TestMenmap1.html which is a combination of the pageTop.html, our Virtel template tags, and the pageBottom.html html elements. If we have a look at the created TestMenmap1.html in the Template folder you can see it has three distinct <div> areas. The top page identified by id “headband”, the middle portion identified by id “dynamic”. The bottom code is everything following this closing </div> on the dynamic area. If you look at pageTop.html and pageBottom.html you will see how these two elements split the dynamic <div> and the <form> elements. By default the dynamic form is called “VirtelForm”.
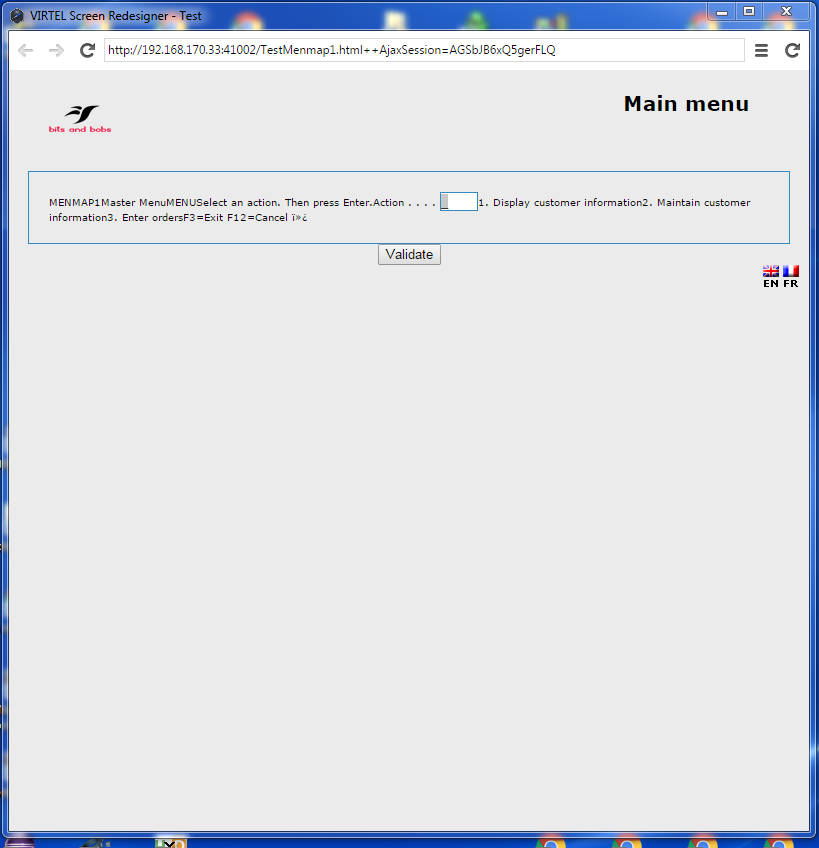
We upload testmenmap1.html through the upload ICON in the ‘Try it’ section to the CLI-DIR directory and we re-capture and render our changes to view the changes we have made. Here are the results:-
Well, this confirms that our menu.css is being used to modernize our presentation. We continue modifying our menu.css until we get the desired look. We remove the Virtel logo and add our own, change a few other things and end up with a page that looks like this:-
So we have changed the static elements of our modernized display by modifying the pageTop and pageBottom web elements but our dynamic middle section, as represented by the template tags that VSR has generated still looks very mucg the same. WE now turn our attention to modernizing this area through working on the VSR workbench.
VSR WorkBench Options
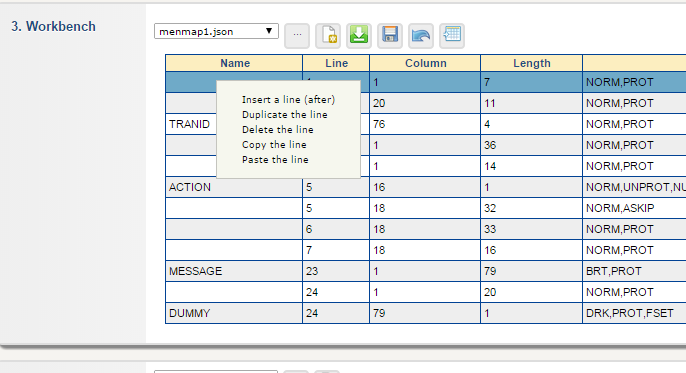
Line options
If we right click on a line within the workbench we are presented with a sub menu which provides us with some line editing tools. We will be using these to help in our modernization.
The first thing we are going to do is to make the first element in the work a <h1> html element. To do this we insert a line before and after and set those lines to html tags <h1> and </h1> respectively.
With the additional HTML rows are Workbench now looks like this:-

We regenerate our template using the generate template in Section 4 of VSR, save it then upload it. When we render the changes the modernized screen looks like:-
We modify the workbench again to remove some elements that we do not require in our modernized screen and modify others. We perform the following VSR tasks after modifying our workbench:-
Save the workbench
Export it as a XML file. (Easier when doing a lot of updates. You can import the XML file).
Create the template
Save the template and build new test.HTML file.
Upload test.HTML file
Open the Capture window.
Our results look like this:-
Our first screen looks slightly webified. A lot more to do but it is a start.
Using “Standard” or “Production Mode”
In our previous modernization with “Test” mode there was no interaction with the back end application. Virtel captured the screen that we wanted to work on, applied the modernization templates that we had built and should us the result. This was all done in the browser using HTML and Javascript. Now we want to see what happens when we us the modernized panel with the back end application. To do that we need to use VSR “Standard” or “production” mode operation.
In standard mode we are dependent on a scenario to perform the modernization work. When Virtel receives the 3270 buffer from the application the scenario invoke the sub-page template that will capture the relevant fields from within the 3270 buffer and build our modernized screen before serving it to the browser as an AJAX request. We switch to standard mode by selecting “in standard mode” at the bottom of the VSR panel.
The first process is to save our template to a production name rather than a test name as we did in “Test” mode. The name we chose must also tie up with the scenario. In our example we have associated menu MENMAP1 with sub-page template ProdMenmap1.html. You can see this association if you look at the scenario example in Appendix A. We perform this action in the section 4 of the VSR panel, but changing the name to ProdMenmap1.html. Pressing the ICON with the three dots allows us to enter the name in the drop down. Next we upload our production template to Virtel.
Now, before doing anything else we ensure that our MENUAJAX scenario has been assembled and link edited into our Virtel user steplib. This is normally a load library reserved for user modifications and proceeds the distributed Virtel steplib library. Once successfully assembled and linked we tell Virtel to load it in preparation for our standard test. We issue the command:-
F Virtel,new=menuajax
This will load or refresh the copy of the scenario. We are now ready to test our modernized template in production mode. Pressing the “Try it” ICON, third one on the left hand side in section 5 we are presented with the following “base” template. This is derived from the default myAPPL.htm template.
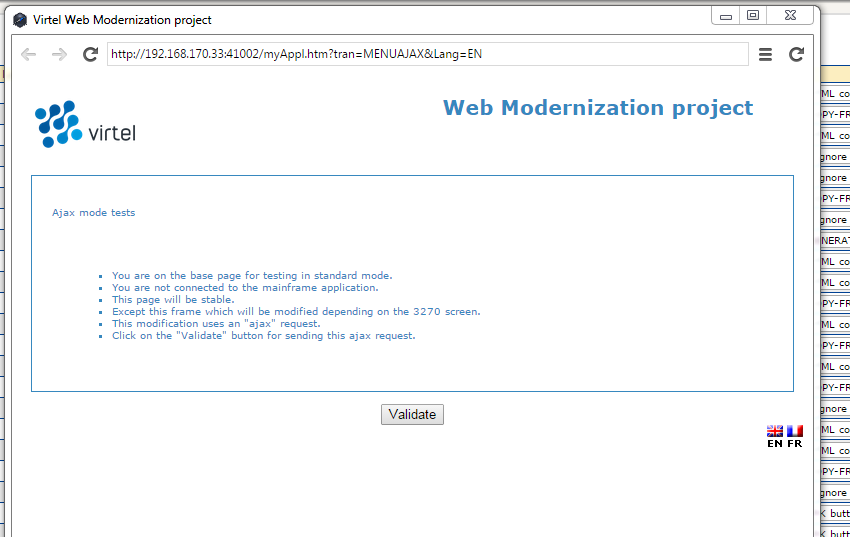
It contains top and bottom static areas and a dynamic sub-page middle area which will be replaced by the sub-page template we have built. Pressing validate will display our modernized template area.
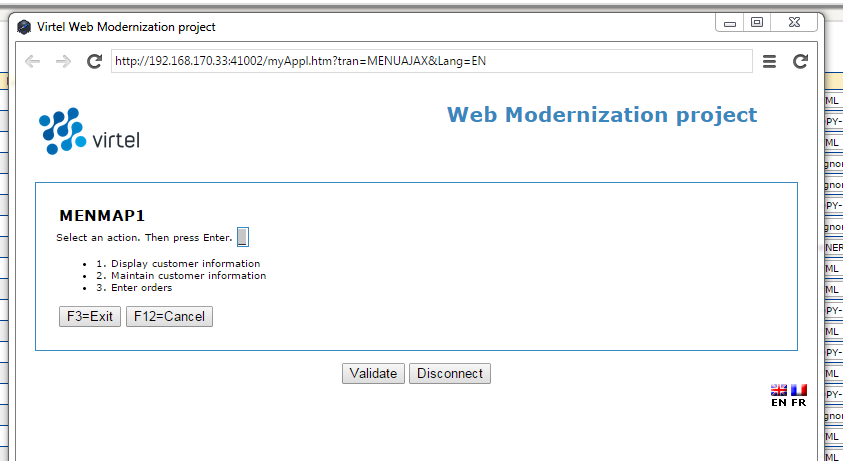
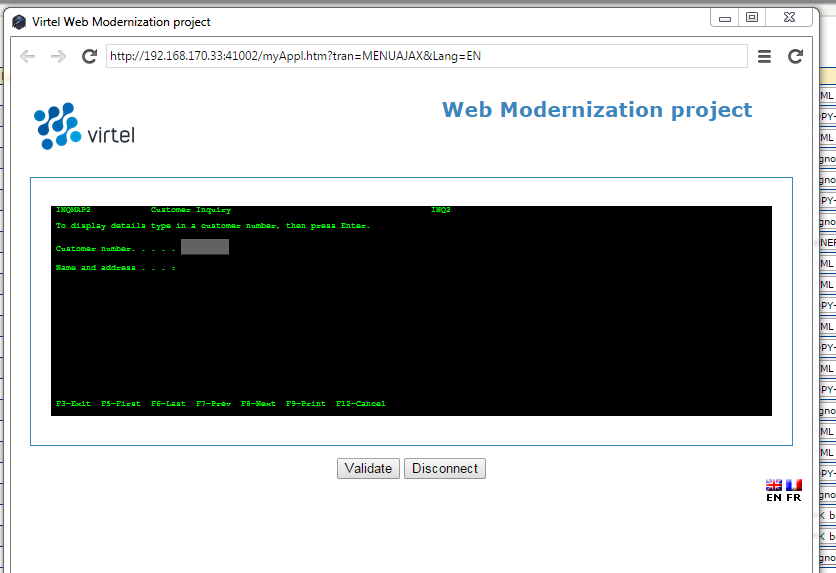
Now, if we select an action this should be passed to the application and the application should return with the next panel in the navigation sequence. We select option 1 and press enter. The screen is updated with the next panel display un-modernized panel INQMAP2.
All seems to be working. We have modernized the primary panel of our application and tested that it works with the back end application. There is still further work to be done. First we have to update the default myAPPL.htm so that it has are static elements that we built in the PageTop.html and PageBottom.html templates during “test mode”. Then we have to navigate through our application capturing the MAPS and modernizing each one. We also might have to refactor our scenario to put in more meaningful business logic.
Appendix A
* ---------------------------------------------------------------------
* SCENARIO FOR VIRTEL SCREEN REDESIGNER
* Screen selection for MENU application
* ---------------------------------------------------------------------
MEMNUAJAX       SCREENS APPL=MENUAJAX
*
                        SCENARIO OUTPUT
*
* Analyze the screen ident to be recognized:
* - line AA
* - column BB
* - length CC
* (fill in AA,BB and CC)
*
* Search for screen identifiers (e.g. XXXXXXXX, YYYYYYYY)
* which have been chosen for Webified Presentation
*
* Code one or more IF$ or CASE$:
*
* CASE$ (AA,BB,CC), *
* (EQ,'XXXXXXXX',MENU00X), *
* (EQ,'YYYYYYYY',MENU00Y), *
* ELSE=CLASSIC
*
PIVOT           IF$ (01,02,07),EQ='MENMAP1',THEN=MENU00X,ELSE=OTHER1
*
OTHER1          IF$ (01,02,07),EQ='MENMAP2',THEN=MENU00Y,ELSE=OTHER2
*
OTHER2          IF$ (01,02,07),EQ='MENMAP3',THEN=MENU00Z,ELSE=CLASSIC
*
* Screen XXXXXXXX
* Send the sub-page associated with this screen ident
* (replace PGXXXXXX.html by the name chosen)
*
MENU00X         DS 0H
                        SET$ PAGE,'ProdMenumap1.html'
                        SCENARIO END
*
* Screen YYYYYYYY
* Send the sub-page associated with this screen ident
* (replace PGYYYYYY.html by the name chosen)
*
MENU00Y         DS 0H
                        SET$ PAGE,'ProdMenumap2.html'
                        SCENARIO END
*
* Screen ZZZZZZZZ
* Send the sub-page associated with this screen ident
* (replace PGZZZZZZ.html by the name chosen)
*
MENU00Z         DS 0H
                        SET$ PAGE,'ProdMenumap3.html'
                        SCENARIO END
*
* Screen ident not recognized
* Use classic 3270 presentation sub-page
*
CLASSIC         DS 0H
                        SET$ PAGE,'VSRajax.html'
                        SCENARIO END
*
                        SCRNEND
                        END