Virtel LU Nailing
Introduction
Description
This document describes procedures for assigning fixed LU names to specific users in VIRTEL Web Access. This is known as LU nailing. Before you attempt the procedures described in this document, you should first install VIRTEL and get basic access to your 3270 application working using the sample definitions provided with the product. Do not attempt to define LU nailing with cookies until you have got the basic VIRTEL Web Access functions working and demonstrated to your satisfaction.
What is VIRTEL Web Access?
VIRTEL Web Access is a software product which enables users to access mainframe 3270 applications from a standard web browser, without intermediate servers, without Java, and without installing any additional software on the workstation.
What is LU nailing?
When a user connects to a 3270 application through VIRTEL Web Access, VIRTEL makes it appear to the application as if the user is connecting from a virtual 3270 terminal. In VTAM terms a virtual 3270 terminal is called a Logical Unit or LU, and each LU has a unique eight character name (LU name). VIRTEL has at its disposal a pool of LUs known to VTAM, whose names are specified in the VIRTEL configuration file (the VIRARBO file). Normally when a user connects to a 3270 application, VIRTEL chooses any available LU from the pool.
While most mainframe applications will accept a connection from any LU name, certain applications (particularly applications which run under IMS) are sensitive to the LU name because they assign permissions to the user based upon the LU name of the user’s terminal. LU nailing allows VIRTEL to assign a particular LU name to a user based upon the user’s IP address or upon a cookie presented by the user’s browser.
What are the different types of LU nailing?
This document describes the following types of LU nailing:
LU nailing by IP address
LU nailing by cookie delivered by e-mail
LU nailing by cookie obtained by self-registration
LU nailing by URL
How to activate LU nailing by IP address
Description
This chapter describes the procedure for setting up a VIRTEL configuration which will map specific IP addresses to predefined LU names. This kind of mapping is suitable where users connect from fixed IP addresses. The mapping is done by VIRTEL “rulesâ€, and does not require cookies.
The procedure is described by way of two examples. The first example shows how to map individual IP addresses to specified LU names. The second example shows how to map a range of IP addresses to a pool of LU names.
Mapping individual IP addresses to LU names
In this example we will choose three IP addresses and map each one to a specific LU name, as shown in the table below:
IP address |
LU name |
192.168.0.39 |
RHTVT001 |
192.168.0.147 |
RHTVT002 |
192.168.0.45 |
RHTVT003 |
To configure this mapping we will add three rules to the W-HTTP line. This is the line defined as port 41001 in the VIRTEL sample configuration.
First logon to VIRTEL via (tn)3270 and press F1=Admin, or select Admin from the VIRTEL Web Access menu. Then select F1=Lines. Put the cursor on W-HTTP and press F12 to see the LINE DETAIL DEFINITION panel, then F5 to see the rules associated with the line:
LIST of RULES in RULE SET: W-HTTP ---------------- Applid: SPVIRBW  14:18:20
Name     Status Description                              Entry Point
WHT00100 ACTIVE HTTP access (users authorised by cookie) $COOKIE$
WHT00200 ACTIVE HTTP access (other users)                WEB2HOST

P1=Update P2=Suppress P3=Return P6=1st page P7=Page-1 P8=Page+1 P12=Edit
Figure 1 List of rules for W-HTTP line
Place the cursor on WHT00200 and press F12 to add a new rule. We will add one new rule for each IP-LU mapping. Here is what you need to enter to create the first rule:
DETAIL of RULE from RULE SET: W-HTTP ------------- Applid: SPVIRBW 14:30:38
Name        ===> WHT00110 Rule priority is per name
Status      ===> ACTIVE 15 Feb 2010 14:30:35 SPTBOWL
Description ===> HTTP access from IP 192.168.0.39
Entry point ===> WEB2HOST Target Entry Point
Parameter   ===> RHTVT001 &1 value or LUNAME
Trace       ===> 1=commands 2=data 3=partner
C : 0=IGNORE 1=IS 2=IS NOT 3=STARTS WITH 4=DOES NOT 5=ENDS WITH 6=DOES NOT
1 IP Subnet   ===> 192.168.000.039 Mask ===> 255.255.255.255
0 Host        ===>
0 eMail       ===>
0 Calling DTE ===> Calling DTE address or proxy
0 Called      ===> Called DTE address
0 CUD0 (Hex)  ===> First 4 bytes of CUD (X25 protocol)
0 User Data   ===>
0 Days        ===> M: T: W: T: F: S: S:
0 Start time  ===> H: M: S: End time ===> H: M: S:
P1=Update P3=Return Enter=Add P4=Activate P5=Inactivate P12=Entry P.
Figure 2 Rule to map IP address 192.168.0.39 to LU RHTVT001
You must choose a unique name for the rule. Here we have chosen WHT00110, to fit in with the names delivered in the sample configuration. Rules are processed in alphanumeric order of name, so it is important that the name you choose should precede the name of the default rule, which is delivered as WHT00200. For a production configuration you could choose any naming scheme.
In the IP Subnet field, place a 1 in the column on the left (this activates the testing of the IP address for this rule), and then type the IP address “192.168.000.039†into the field as shown. The Mask field must contain 255.255.255.255 which means that the entire IP address is tested.
For documentation purposes, you should also include the IP address in the Description field.
In the Parameter field, type the name of the LU to be nailed to this IP address.
Note: the LU name must be defined in a VIRTEL pool, see Adding LUs to the pool’s.
The Entry Point field should contain WEB2HOST, which is the normal entry point associated with the W-HTTP line on port 41001.
Now press ENTER to add the rule, then F4 to activate it.
Next repeat the process to add the second rule:
DETAIL of RULE from RULE SET: W-HTTP ------------- Applid: SPVIRBW 15:58:04
Name        ===> WHT00120 Rule priority is per name
Status      ===> ACTIVE 15 Feb 2010 15:58:03 SPTBOWL
Description ===> HTTP access from IP 192.168.0.147
Entry point ===> WEB2HOST Target Entry Point
Parameter   ===> RHTVT002 &1 value or LUNAME
Trace       ===> 1=commands 2=data 3=partner
C : 0=IGNORE 1=IS 2=IS NOT 3=STARTS WITH 4=DOES NOT 5=ENDS WITH 6=DOES NOT
1 IP Subnet   ===> 192.168.000.147 Mask ===> 255.255.255.255
0 Host        ===>
0 eMail       ===>
0 Calling DTE ===> Calling DTE address or proxy
0 Called      ===> Called DTE address
0 CUD0 (Hex)  ===> First 4 bytes of CUD (X25 protocol)
0 User Data   ===>
0 Days        ===> M: T: W: T: F: S: S:
0 Start time  ===> H: M: S: End time ===> H: M: S:
P1=Update P3=Return Enter=Add P4=Activate P5=Inactivate P12=Entry P.
Figure 3 Rule to map IP address 192.168.0.147 to LU RHTVT002
Press ENTER to add the rule and F4 to activate it.
Then the same for the third rule:
DETAIL of RULE from RULE SET: W-HTTP ------------- Applid: SPVIRBW 16:00:45
Name        ===> WHT00130 Rule priority is per name
Status      ===> ACTIVE 15 Feb 2010 16:00:20 SPTBOWL
Description ===> HTTP access from IP 192.168.0.45
Entry point ===> WEB2HOST Target Entry Point
Parameter   ===> RHTVT003 &1 value or LUNAME
Trace       ===> 1=commands 2=data 3=partner
C : 0=IGNORE 1=IS 2=IS NOT 3=STARTS WITH 4=DOES NOT 5=ENDS WITH 6=DOES NOT
1 IP Subnet   ===> 192.168.000.045 Mask ===> 255.255.255.255
0 Host        ===>
0 eMail       ===>
0 Calling DTE ===> Calling DTE address or proxy
0 Called      ===> Called DTE address
0 CUD0 (Hex)  ===> First 4 bytes of CUD (X25 protocol)
0 User Data   ===>
0 Days        ===> M: T: W: T: F: S: S:
0 Start time  ===> H: M: S: End time ===> H: M: S:
P1=Update P3=Return Enter=Add P4=Activate P5=Inactivate P12=Entry Point
Figure 4 Rule to map IP address 192.168.0.45 to LU RHTVT003
Again press ENTER to add the rule and F4 to activate it.
Finally press F3 to go back to the list of rules for the W-HTTP line, which should now look like this:
LIST of RULES in RULE SET: W-HTTP ---------------- Applid: SPVIRBW    16:02:33
Name     Status Description                              Entry Point
WHT00100 ACTIVE HTTP access (users authorised by cookie) $COOKIE$
WHT00110 ACTIVE HTTP access from IP 192.168.0.39         WEB2HOST
WHT00120 ACTIVE HTTP access from IP 192.168.0.147        WEB2HOST
WHT00130 ACTIVE HTTP access from IP 192.168.0.45         WEB2HOST
WHT00200 ACTIVE HTTP access (other users)                WEB2HOST
P1=Update P2=Suppress P3=Return P6=1st page P7=Page-1 P8=Page+1 P12=Edit
Figure 5 Updated list of rules for W-HTTP line
Now, for example, when you connect to a host application via VIRTEL port 41001 from a browser at address 192.168.0.147, you will get LU name RHTVT002.
Mapping a range of IP addresses to a pool of LU names
The second example shows how to map a range of IP addresses to a pool of LU names. We will add an additional rule which will ensure that all connections in the network 192.168.100.0 through 192.168.100.255 will be assigned the next unused LU name in the range RHTVT1xx, as shown in the table below:
IP address |
LU name |
192.168.100.nnn |
RHTVT1xx |
To set up this mapping we will add another rule, using the same procedure as described in the previous section. The rule is shown below:
DETAIL of RULE from RULE SET: W-HTTP ------------- Applid: SPVIRBW    17:53:56
Name        ===> WHT00140 Rule priority is per name
Status      ===> ACTIVE 15 Feb 2010 17:53:49 SPTBOWL
Description ===> HTTP access from IP 192.168.100.nnn
Entry point ===> WEB2HOST Target Entry Point
Parameter   ===> RHTVT1\* &1 value or LUNAME
Trace       ===> 1=commands 2=data 3=partner
C : 0=IGNORE 1=IS 2=IS NOT 3=STARTS WITH 4=DOES NOT 5=ENDS WITH 6=DOES NOT
1 IP Subnet   ===> 192.168.100.000 Mask ===> 255.255.255.000
0 Host        ===>
0 eMail       ===>
0 Calling DTE ===> Calling DTE address or proxy
0 Called      ===> Called DTE address
0 CUD0 (Hex)  ===> First 4 bytes of CUD (X25 protocol)
0 User Data   ===>
0 Days        ===> M: T: W: T: F: S: S:
0 Start time  ===> H: M: S: End time ===> H: M: S:
P1=Update P3=Return Enter=Add    P4=Activate P5=Inactivate P12=Entry P.
Figure 6 Rule to map IP address 192.168.100.nnn to LU pool RHTVT1xx
The new rule is named WHT00140, the IP Subnet field specifies the IP address 192.168.100.000, and the Mask is set to 255.255.255.000 to indicate that only the first three octets of the IP address are tested to determine whether the rule matches the IP address of the client browser. The parameter field specifies a generic LU name RHTVT1* which signifies that any LU whose name begins with RHTVT1 may be assigned to clients whose IP address matches this rule.
Note: the LU names must be defined in a VIRTEL pool, see Adding LUs to the pool.
Press ENTER to add the rule, then F4 to activate it.
The default rule
You will notice that there is a default catch-all rule WHT00200 (other users) which will be taken for any IP address which is not matched by one of the earlier rules. If you do not want unmatched IP addresses to be able to access the system, change this rule so that it specifies a non-existent LU name in the parameter field. This will cause VIRTEL to issue an error message and close the connection. Optionally, you could change this rule so that it goes to an entry point which displays a panel with an appropriate message such as Access not authorized.
Adding LUs to the pool
Displaying the terminal pool
All LUs which participate in LU nailing must be defined to VIRTEL in a terminal pool. To view the terminal pools, logon to VIRTEL via (tn)3270 and press F1=Admin, or select Admin from the VIRTEL Web Access menu. Then select F2=Terminals. You will see a panel similar to the one shown in the figure below:
LIST of TERMINALS ---------------------------------- Applid: SPVIRBW 18:03:43
Terminal Repeated Relay    Entry     Type I/O Pool     2nd Relay
?\*\*\*  0000     RVTAM=== PC        2
CLLOC000 0050                        3     3
CLVTA000 0080              \*W2HPOOL 3     3
DELOC000 0010                        3     3
DEVTA000 0016              \*W2HPOOL 3     3
SMLOC000 0016               SMTP     3     3
W2HIM000 0080     RHTIM000           2     1
W2HTP000 0080     RHTVT000           3     3 \*W2HPOOL RHTIM000

P1=Update P2=Delete P3=Return P6=1st Page P7=Page-1 P8=Page+1 P12=Details
Figure 10 List of terminals
In the above display we can see that there are 80 terminals in the pool named *W2HPOOL, and their internal names are W2HTP000 to W2HTP079. The corresponding LU names are RHTVT000 to RHTVT079, and these are the LU names available for LU nailing when the system is initially installed.
In the following sections we shall see how to add LU names to the pool.
Adding a terminal to the pool
In this section we will add a new LU named NYCTERM to the terminal pool used for Web Access. Position the cursor on W2HTP000 and press F12 to display the TERMINAL DEFINITION DETAIL screen, and fill in the fields as shown below:
TERMINAL DETAIL DEFINITION ------------------------- Applid: SPVIRBW 12:45:13
Terminal ===> W2NYC000 ?wxyZZZZ for dynamic allocation
w : Sna or Non-sna or \* (category)
x : 1, 2, 3, 4, 5 or \* (model)
y : Colour, Monochrome or \*
Z : any characters
Relay    ===> NYCTERM Name seen by VTAM applications
= : copied from the terminal name
\*Pool name    ===> \*W2HPOOL Pool where to put this terminal
Description    ===> Relay pool for HTTP
Entry Point    ===> Enforced Entry Point
2nd relay      ===> Possible 2nd relay (Printer)
Terminal type  ===> 3 1 = LU1 2 = 3270 3 = FastConnect
Compression    ===> 2 0, 1, 2 or 3 : compression type
Possible Calls ===> 3 0=None 1=Inbound 2=Outbound 3=Both
Write Stats to ===> 12 1,4=VIRSTAT 2=VIRLOG
Repeat         ===> 0001 Number of generated terminals

P1=Update P3=Return Enter=Add P12=Server
KEY IN DATA AND PRESS ENTER
Figure 11 Adding a terminal to the pool
The terminal name is an internal name used only within VIRTEL. Any name may be chosen so long as it does not duplicate any other terminal name or any LU name.
The relay name is the LU name. This LU must also be defined in the VIRTAPPL node in USER.VTAMLST.
The pool name must be specified as *W2HPOOL to associate the terminal with Web Access.
Set the repeat count to 1 as we are defining only one terminal.
Now press Enter to add the terminal definition, and press F3 to return to the list of terminals.
Adding a range of terminals to the pool
In this section we will add a range of LU names SJC001 to SJC010 to the terminal pool for Web Access. Press F12 in the LIST of TERMINALS screen and fill in the fields as shown below:
TERMINAL DETAIL DEFINITION ------------------------- Applid: SPVIRBW 12:45:13
Terminal ===> W2SJC001 ?wxyZZZZ for dynamic allocation
w : Sna or Non-sna or \* (category)
x : 1, 2, 3, 4, 5 or \* (model)
y : Colour, Monochrome or \*
Z : any characters
Relay ===> SJC001 Name seen by VTAM applications
= : copied from the terminal name
\*Pool name ===> \*W2HPOOL Pool where to put this terminal
Description ===> Relay pool for HTTP
Entry Point ===> Enforced Entry Point
2nd relay ===> Possible 2nd relay (Printer)
Terminal type ===> 3 1 = LU1 2 = 3270 3 = FastConnect
Compression ===> 2 0, 1, 2 or 3 : compression type
Possible Calls ===> 3 0=None 1=Inbound 2=Outbound 3=Both
Write Stats to ===> 12 1,4=VIRSTAT 2=VIRLOG
Repeat ===> 0010 Number of generated terminals
P1=Update P3=Return Enter=Add
P12=Server
KEY IN DATA AND PRESS ENTER
Figure 12 Adding a range of terminals to the pool
The terminal name is the internal name of the first terminal in the range. The name should contain sufficient trailing numeric characters to accommodate the number of terminals in the range, without duplicating any other terminal name or LU name.
The relay name is the LU name of the first terminal in the range. This name must also contain sufficient trailing numeric characters. All the LUs in the range must be defined in the VIRTAPPL node in USER.VTAMLST.
The pool name must be specified as *W2HPOOL.
Set the repeat count to 10 to define ten terminals SJC001 to SJC010.
Displaying the updated terminal pool
Press Enter to add the terminal definition, then press F3 to return to the list of terminals, which should now look like this:
LIST of TERMINALS ---------------------------------- Applid: SPVIRBW 15:57:28
Terminal Repeated Relay        Entry Type I/O Pool     2nd Relay
?\*\*\*  0000     RVTAM===     PC       2   3
CLLOC000 0050                           3   3
CLVTA000 0080    \*W2HPOOL              3   3
DELOC000 0010                           3   3
DEVTA000 0016    \*W2HPOOL              3   3
SMLOC000 0016     SMTP                  3   3
W2HIM000 0080     RWTIM000              2   1
W2HTP000 0080     RWTVT000              3   3 \*W2HPOOL RWTIM000
W2NYC000 0001     NYCTERM               3   3 \*W2HPOOL
W2SJC001 0010     SJC001                3   3 \*W2HPOOL

P1=Update P2=Delete P3=Return P6=1st Page P7=Page-1 P8=Page+1 P12=Details

Figure 19 Updated list of terminals
LU nailing by cookie obtained by self-registration.
Description
In this section we explain how to set up self-registration. Self-registration is a process whereby a user can connect to Virtel and self-register their details. Upon self-registration Virtel will deliver a clickable link which will deliver the security code to the user’s browser via a cookie. Users or correspondents as they are called, who use this process are defined as local or changing users. A local correspondent will have a fixed security code, whereas a changing correspondent will have a new security code each time they connect.
Setup
For Virtel Self Registration to work a certain amount of customization is required. In the example that follows we will demonstrate setting up a self-registration process by using the VIRCONF ARBO configuration tool.
In our example, a new line will be created to support self-registration users. A new directory will be created to support the web elements. The relevant ARBO configuration statements and WEB artifacts will be installed in their respective repositories.
The following diagram gives an overview of the Virtel schematic to support self-registration.

Figure 12 - Overview of Self Registration
The Line definition
LINE ID=X-HTTP,
NAME=HTTP-EXC,
LOCADDR=192.168.170.33:41003,
DESC='HTTP line (EXC WEB application)'
TERMINAL=XL,
TYPE=TCP1,
INOUT=1,
PROTOCOL=VIRHTTP,
TIMEOUT=0000,
ACTION=0,
WINSZ=0000,
PKTSZ=0000,
RETRY=0010
This line definition will accept calls on port 41003. Its associated terminal definitions are prefixed with the characters XL. The internal name for the line is X-HTTP and the external name HTTP-EXEC.
The terminal definitions
TERMINAL ID=XLPC0000,
RELAY=HOLTWIN7,
POOL=\*XLCPOOL,
DESC='PC definition for Ed Holt',
TYPE=3,
COMPRESS=2,
INOUT=3,
STATS=26,
REPEAT=0001
*
TERMINAL ID=XLLOC000,
DESC='Terminals with no relay',
TYPE=3,
COMPRESS=2,
INOUT=3,
STATS=26,
REPEAT=0010,
TERMINAL ID=XLPOOL0,
RELAY=\*XLCPOOL,
DESC='Pool for relay (users with cookie)',
TYPE=3,
COMPRESS=2,
INOUT=3,
STATS=26,
REPEAT=0016
Three different types of terminal statements are required. First, a terminal relay pool is defined by the XLPOOL0 statement. It represents 16 relay terminals in a pool. Any user terminal statement supporting an external user, i.e. a PC, must refer to this pool. The XLLOC000 statement defines a local terminal range of 16 terminals. These not relay related definitions and as such do not refer to the pool. They are used to support Virtel internal work tasks. The XLPC0000 statement represents a user’s dedicated PC connection and refers to the XLPOOL0 pool where it will obtain a relay LU when this user connects. For each PC there must be a separate terminal statement which defines the LU name to be used. In this case the LU name that would be used is HOLTWIN7.
The administration sub application Correspondent is the tool that manages the physical PC representation to a logical LU name. In following screen shot we can see how self-registration of a user collocates with a predefined LU name.
CORRESPONDENT DETAIL DEFINITION -------------------- Applid: APPLHOLT 18:16:00
Id                 ===> HOLT-WIN7/workstation/lan
Type of Id         ===> 2 1:Email 2:Local+fixed 3:Local+changing
Activation message ===>
Text of 'OK' message to user.
VTAM name      ===> HOLTWIN7 &1 parameter to specify VTAM LU name
Rule Set       ===> Rules to choose an entry point
Directory      ===> Where data is to be uploaded
Last contact   ===> 04 Apr 2016 18:13:10 192.168.092.065
Contacts       ===> 00000001 Number of times cookie was updated
Date created   ===> 04 Apr 2016 18:13:09
Created by     ===> sptholt
Date activated ===> 04 Apr 2016 18:13:09
Activated by   ===> sptholt
Date disabled  ===>
Disabled by    ===>

P1=Update P3=Return Enter=Add P4=Activate P5=Disable P6=Rules

UPDATE OK
Figure 13 Correspondent Detail Definition
As you can see, the ID is the physical PC name submitted by the user during the Self-Registration process and the VTAM name is the LU name that will be associated with this PC. The Correspondent sub-application is where users and LU names defined. For self-registration the id type is ‘2’. An entry will be made into the Correspondent HTML VSAM file every time a user goes through the self-registration process. Self-registration users are controlled through rules attached to the line. The rules attached to the X-HTTP line are as follows.
The Rule definitions
RULE ID=R0000100,
LINE=X-HTTP,
STATUS=ACTIVE,
DESC='Local HTTP access (users authorised by cookie)',
ENTRY=EXCWHOST,
PARAM=$COOKIE$,
IPADDR=(EQUAL,192.168.000.000),
NETMASK=255.255.000.000
*
RULE ID=R0000200,
LINE=X-HTTP,
STATUS=ACTIVE,
DESC='Self-registration (local users without cookie)',
ENTRY=INITVTAM,
IPADDR=(EQUAL,192.168.000.000),
NETMASK=255.255.000.000
*
RULE ID=R0000300,
LINE=X-HTTP,
STATUS=ACTIVE,
DESC='HTTP access (IP address not valid)',
ENTRY=EPREJECT
For line X-HHTP, serving port 41003, only IP address beginning 192.168.*.* will be allowed to self-register. Any other IP address using this port will be passed to an ENTRY POINT called EPREJECT where a reject message will be served and displayed on the users screen.
The first time a user calls in on 41003 there will be no cookie passed. Rule R0000200 will pick up this call and call entry point INITVTAM. This will initiate the self-registration process. For users already self-registered the call in will contain a cookie in the HTTP request. This will be trapped by rule R0000100 and passed to entry point EXCWHOST.
The Entry Points
ENTRY ID=EPREJECT,
DESC='Entry point for unauthorized HTTP users',
TRANSACT=REJ,
TIMEOUT=0720,
ACTION=0,
EMUL=HTML,
SIGNON=VIR0020H,
MENU=VIR0021A,
EXTCOLOR=X
ENTRY ID=EXCWHOST,
DESC='EXC WEB entry point (users with cookie)',
TRANSACT=EXCW,
TIMEOUT=0720,
ACTION=0,
EMUL=HTML,
SIGNON=VIR0020H,
MENU=VIR0021A,
EXTCOLOR=X
ENTRY ID=INITVTAM,
DESC='Self-registration for line X-HTTP',
TRANSACT=INITV,
TIMEOUT=0025,
ACTION=0,
EMUL=HTML,
SIGNON=VIR0020V,
MENU=VIR0021B,
EXTCOLOR=X
These three entry points perform the logic the self-registration process through there associated transactions. Each entry point is associated with a group of transactions identified by the TRANSACT= keyword. Depending on the entry point selected by the rule will determine what default transaction will get called. The name of the transaction will always equal the name of the entry point.
The Transactions
Transactions are associated with entry points by a common prefix identified in the Entry point through the TRANSACT= keyword.
The transactions for EPREJECT are:-
TRANSACT ID=REJ-00,
NAME=EPREJECT,
DESC="Default directory = entry point name",
APPL=W2H-DIR,
TYPE=4,
TERMINAL=XLLOC,
STARTUP=2,
SECURITY=0
This is the default transaction for entry point EPREJECT. If called it will search for a page called EPREJECT.HTM in the W2H-DIR directory and server it to the user.
The transactions for INITVTAM are:-
TRANSACT ID=INITV-00,
NAME=INITVTAM,
(EN) DESC='Directory for LU NAILING',
APPL=EXC-DIR,
TYPE=4,
TERMINAL=XLLOC,
STARTUP=2,
SECURITY=0
TRANSACT ID=INITV-03,
NAME='w2h',
(EN) DESC='W2H toolkit directory (/w2h)',
APPL=W2H-DIR,
TYPE=4,
TERMINAL=XLLOC,
STARTUP=2,
SECURITY=0
TRANSACT ID=INITV-10,
NAME=NAIL,
DESC='Auto-create correspondent record',
APPL=VIR0041V,
TYPE=2,
TERMINAL=XLLOC,
STARTUP=2,
SECURITY=2
INIT-00, the default page for entry point INITVTAM, will serve the HTML page INITVTAM.HTM from the EXEC-DIR directory.
INIT-03 provides a routing to the Virtel W2H-DIR directory.
INITV-10 is a transaction called within the INITVTAM.HTM page.
It is associated with the web elements CONFIRMANDGO.HTM and CONFIRMANDWAIT.HTM. These two pages are URL links in INITVTAM.HTM and can be found in the EXC-DIR directory. During self-registration a user will click one of two options to complete the self-registration process from the INITVTAM.HTM page.
The transactions for EXCWHOST are:-
TRANSACT ID=EXCW-00,
NAME=EXCWHOST,
DESC='HTML page directory (default access)',
APPL=EXC-DIR,
TYPE=4,
TERMINAL=XLLOC,
STARTUP=2,
SECURITY=0
TRANSACT ID=EXCW-20,
NAME='w2h',
DESC='W2H toolkit directory (/w2h)',
APPL=W2H-DIR,
TYPE=4,
TERMINAL=XLLOC,
STARTUP=2,
SECURITY=0
TRANSACT ID=EXCW-41,
NAME=IMS,
DESC='IMS access with cookie',
APPL=IMS3270,
TYPE=1,
TERMINAL=XLVTC,
STARTUP=1,
SECURITY=0
TRANSACT ID=EXCW-42,
NAME=TSO,
DESC='TSO access with cookie',
APPL=TSO,
TYPE=1,
TERMINAL=XLVTC,
STARTUP=1,
SECURITY=0
The default transaction, EXCW-00, will serve page EXCWHOST.htm from the EXC-DIR directory. EXCW-01 is a routing transaction that provides a link to the web elements in W2H-DIR and EXCW-41 and EXCW-42 are VTAM application definitions that are available to self-registration users. These transaction are accessed via hard coded links in the EXCWHOST.HTM page but equally could be part of an APPLIST menu display.
The Correspondent Sub Application
Access to the Correspondent Sub Application is as follows. From the VIRTEL Configuration Menu, press F5=Correspondents.
Configuration Menu --------------------------------- Applid: APPLHOLT  14:11:28
F1 Lines
F2 Terminals
F3 Entry Points
F4 Security
F5 Correspondents
F6 Directories
F7 External servers
F8 Lines Overview
F9 Lines Status
PA2 More sub-applications

CLEAR Return
Figure 14. Selecting the Correspondent Sub Application
A list of self-registered correspondents will appear. In our list there is one user who is recognized by the ID of HOLT-WIN7. This just so happens to be the PC Name belonging to user. Through the sub-application we can associate this user with a relay LUNAME HOLTWIN7.
LIST of CORRESPONDENTS ----------------------------- Applid: APPLHOLT 14:14:33
Id Rules VTAM name Last connection Contacts
HOLT-WIN7/ HOLTWIN7 04 Apr 2016 18:13:10 00000001
P1=Update P2=Delete P3=Return P6=Rules
P7=Previous P8=Next P12=Edit/View
DELETE OK
Figure 15. Listing of Correspondent
The Self-Registration Process
The first phase of the self-registration process is that a user will access the designated port without a security cookie and be routed to the VTAMINIT Entry Point. This will drive the registration process by serving the INITVTAM.HTM page to the user. The user will be presented with the following screen:-
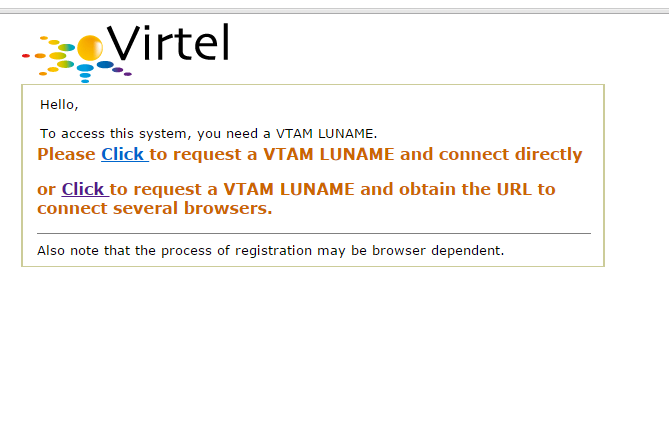
Figure 16. Self-Registration page from VTAMINIT
Two options are provide on this page. Option one is to complete the self-registration proceed to the application menu page or option2 is to complete the self-registration process and wait to be given the URL to connect to the system. This URL can then be used to connect multiple browsers.
Selecting either option invokes the Virtel transaction INITV-10 (NAIL) which uses Security=2. This level of security uses the NTLM handshake protocol to extract additional workstation information. This information is presented in the second page of the self-registration process and can be changed by the user.
Once any option has been selected then the second page of the registration will be present. In this page you provide the LUNAME that you have been allocated (external process) and you collocated correspondent name, by default the work station name.
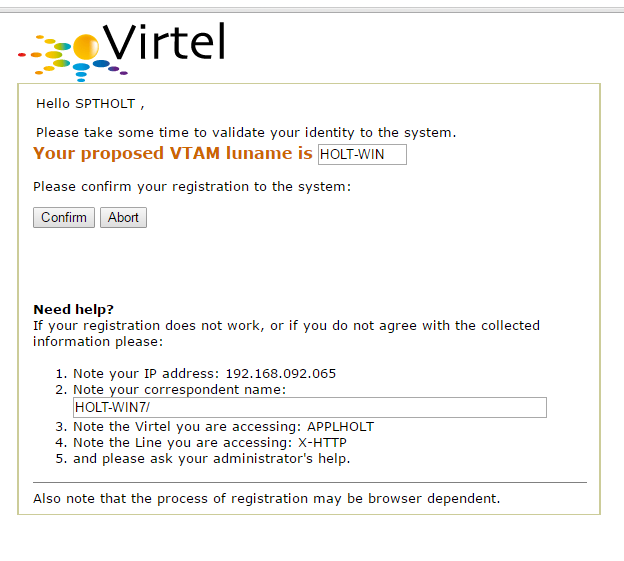
Figure 17. Self-Registration page from VTAMINIT
By confirming the details of the VTAM luname and correspondent (ID) the browser will send the information back to Virtel. Virtel will then record the information in the Correspondent data base and then launch the EXCWHOST transaction which will display a menu page of applications than the user can access.
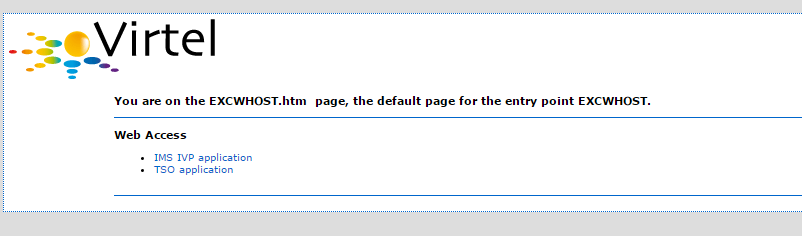
Figure 18. Self-Registration application menu page
In the example for HOLT-WIN7 the entry in the database would look like the following:-
LIST of CORRESPONDENTS ----------------------------- Applid: APPLHOLT 10:41:34
Id         Rules   VTAM name    Last connection Contacts
HOLT-WIN7/         HOLT-WIN     07 Apr 2016 10:32:11 00000002

P1=Update P2=Delete P3=Return P6=Rules P7=Previous P8=Next P12=Edit/View
Figure 19. Correspondent Entry
It is clear that the LUNAME of HOLT-WIN is invalid so this must be corrected in the Edit panel. Pressing PF12 will take us into the Edit panel of the correspondent application where the LUNAME can be amended to the correct name allocated for HOLT-WIN. In this example the name is changed to HOLTWIN7.
CORRESPONDENT DETAIL DEFINITION -------------------- Applid: APPLHOLT 10:49:18
Id         ===> HOLT-WIN7/workstation/lan
Type of Id ===> 2 1:Email 2:Local+fixed 3:Local+changing
Activation message ===>
Text of 'OK' message to user.
VTAM name      ===> HOLTWIN7 &1 parameter to specify VTAM LU name
Rule Set       ===> Rules to choose an entry point
Directory      ===> Where data is to be uploaded
Last contact   ===> 07 Apr 2016 10:32:11 192.168.092.065
Contacts       ===> 00000002 Number of times cookie was updated
Date created   ===> 07 Apr 2016 10:31:59
Created by     ===> sptholt
Date activated ===> 07 Apr 2016 10:31:59
Activated by   ===> sptholt
Date disabled  ===>
Disabled by    ===>

P1=Update P3=Return Enter=Add P4=Activate P5=Disable P6=Rules

UPDATE OK
Figure 20. Updating the Correspondent Entry with the correct LUNAME
Once the LUNAME has been updated the user identified as HOLT-WIN7/ can access applications via the EXCWHOST application list. A VTAM definition must exist to support this user. The VTAM definition will look like this:-
HOLTWIN7 APPL AUTH=(ACQ,PASS),MODETAB=ISTINCLM,DLOGMOD=SNX32702,EAS=1
To support this VTAM LUNAME a Virtel Terminal definition must also exit in the ARBO configuration. The definitional must use a predefined pool. For HOLT-WIN7/ see the terminal definition XLPC0000.
LIST of TERMINALS ---------------------------------- Applid: APPLHOLT 10:59:10
Terminal Repeated Relay Entry Type I/O  Pool      2nd Relay
XLPC0000 0001     HOLTWIN7       3   3  *XLCPOOL
XLPC0001 0001     ISRAEL         3   3  *XLCPOOL
XLVTC000 0016     *XLCPOOL       3   3
P1=Update P2=Delete P3=Return P6=1st Page P7=Page-1 P8=Page+1 P12=Details
Figure 21. Terminal list with the correct Relay(LUNAME) name
The Correspondent Application Options
From within the Correspondent Application self-registered users can be managed. The following option are available:-
PF=1 Update an Entry  Enter Add an Entry
PF=4 Activate a disabled entry  PF=5 Deactivate an Active Entry
PF=6 Add a rule using the IP details.
Using these functions provides a means of administering correspondents. The following is an example of disabling a user:-
CORRESPONDENT DETAIL DEFINITION -------------------- Applid: APPLHOLT 11:07:40
Id ===> HOLT-WIN7/workstation/lan
Type of Id ===> 2 1:Email 2:Local+fixed 3:Local+changing
Activation message ===>
Text of 'OK' message to user.
VTAM name ===> HOLTWIN7 &1 parameter to specify VTAM LU name
Rule Set ===> Rules to choose an entry point
Directory ===> Where data is to be uploaded
Last contact ===> INACTIVATION
Contacts ===> 00000002 Number of times cookie was updated
Date created ===> 07 Apr 2016 10:31:59
Created by ===> sptholt
Date activated ===> 07 Apr 2016 10:31:59
Activated by ===> sptholt
Date disabled ===> 07 Apr 2016 11:07:40
Disabled by ===> SPTHOLT

P1=Update P3=Return Enter=Add P4=Activate P5=Disable P6=Rules

DISABLE WAS DONE
Figure 22. Disabling a Correspondent using PF5
If the user attempts to access the system Virtel will not permit access as the cookie will no longer be valid and the ID will block any further attempts to re-register.
Customization
The sample web elements can be customized. For example, by default, the Correspondent name field is an HTML input field. This allows the user to specify any id. For additional security it is recommended that this field be changed to a displayable field only thereby preventing the user from self-registering against a known LU name. The sample templates CONFIRMANDGO.HTM and CONFIRMANDWAIT.HTM should be amended and the <INPUT> tag removed for this field.
An Virtel APPLIST transaction may be used instead of the static EXCWHOST page.
Virtel scenarios may be used to check and validate the incoming call and introduce different behavior depending on the IP address and variables contained with the cookie.